Sourdough Starter How to Feed
Servings: 1 STARTER
Ingredients
- All-Purpose Flour or 1/2 All Purpose Flour and 1/2 Whole Wheat Flour
- Filtered Tap Water or Bottled Water
- Glass Jars with Lids
Instructions
- DAY 1
- In a glass jar, combine 1/2 cup flour and 1/3 filtered or bottled water.
- Stir until there are no lumps left.
- Cover with a loose fitting lid that allows the starter to "breathe."
- Set the jar in a cool spot and do not disturb for 24 hours. This is your "starter."
- DAY 2
- On Day 2, remove the lid and stir the starter.
- Replace loose fitting lid and continue in a cool spot for 24 hours.
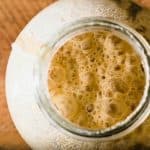
- DAY 3On the morning of Day 3, you should start to see some activity in your starter with bubbles forming on top and you may even notice that your starter has risen some.
- This is the day you will start "feeding" your starter. This process involves taking some of the current starter, discarding the rest, and also includes a "maintenance feeding" at night.
DAY 3 MORNING: FEED THE STARTERIn a CLEAN JAR, add:
- -3 TABLESPOONS starter (discard the rest)
- -1/2 Cup flour
- -1/3 Cup filtered or bottled water
- Stir until well combined and cover with loose-fitting lid. Let sit for 12 hours until you feed it in the evening.
- DAY 3 EVENING: MAINTAIN THE STARTER
MAINTAIN THE STARTER BY ADDING:
- -2 TABLESPOONS flour
- -1 1/2 teaspoons filtered or bottled water
- Stir until well combined. Cover with loose fitting lid. Let sit for 12 hours.
- DAY 4-6Repeat the steps from Day 3, doing the feeding and maintaining each morning and evening.
- Each morning, be sure to use 3 TABLESPOONS of the starter and discarding the rest.
- Then, in the evening, you will maintain it by adding the 2 TABLESPOONS of flour and 1 1/2 teaspoons of water.
- Keep an eye on your yeast! You want to see it get very bubbly. It will also need to double in size to be a strong yeast for bread. (See our tip for keeping track of the size in the NOTES section.)
- **During this time, you may see your yeast rise and then fall again. That means it's not strong enough yet, so you'll need to keep doing the feeding and maintaining cycle. Your yeast may be ready sooner than 7 days or maybe a little longer.
DAY 7In the morning of Day 7:
In a CLEAN JAR, add:
- -3 TABLESPOONS starter (discard the rest)
- -1/2 Cup flour
- -1/3 Cup filtered or bottled water
- Stir until well combined and cover with loose-fitting lid. Let sit for 4 hours.
- Day 7: 4 Hours Later
- It's time to test your starter to see if it's ready to bake with! (YAY!)
- Do this by taking a spoonful of starter into a glass of room temperature water. If the starter floats, it's ready to use to bake with!
- If the starter doesn't float, it is not ready. Continue with the evening maintenance schedule and repeat DAY 7 instructions on DAY 8 until the starter is ready.
IF YOU WANT TO HAVE FRESH STARTER TO USE ANYTIME, BE SURE TO SAVE SOME OF THE STARTER BEFORE YOU BAKE WITH IT. YOU CAN KEEP IT IN THE REFRIGERATOR AND WILL NEED TO MAINTAIN IT BY DOING A SOURDOUGH STARTER FEEDING ONCE PER WEEK.
Notes
TIP: You can place a rubber band around the jar even with the level of the final starter. That way you can see how much your starter is rising or doubling!