
Learning how to make yeast at home is an important cooking skill. It allows you to be self-sufficient in baking bread and other baking recipes. And, it’s a great kitchen science project for kids and food experiment projects! We’ve also included starter for sourdough bread and a sourdough bread recipe, so kids can experience kitchen experiments from creating to baking!

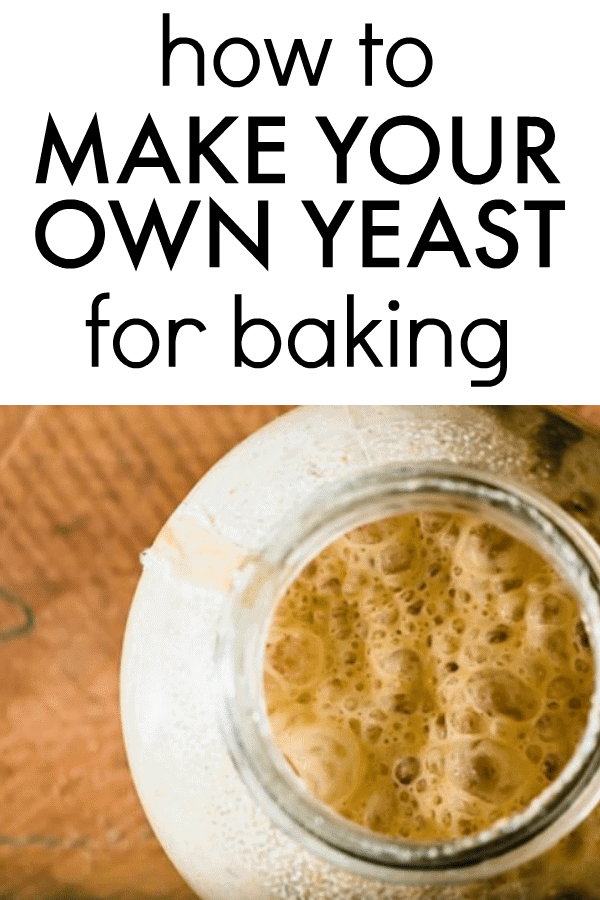
HOW TO MAKE YEAST AT HOME: KITCHEN SCIENCE FOR KIDS
Learning how to make yeast at home is a fun project with kids because it’s a great mix of science and cooking.
You can try out the different ways to make yeast (and even share some yeast starters with friends!) while talking about chemical reactions.
How awesome is that?
(Sorry. My nerd just came out a lil.)
But, seriously, if you’re looking for kitchen chemistry experiments, this is one of the best ones for learning with kids.
Before we get to how to make yeast starter, let’s cover some basic yeast questions about how is yeast.made. (This makes for a great STEM lesson for kids!)
What is yeast and how is it made?
There are all different kinds of species of yeast, but Saccharomyces cerevisiae, or S. cerevisiae, is the species that is used in baking (and brewing and more). Yeasts are actually part of the fungus family. They are good for baking because yeasts ferment, or use energy from sugar without needing oxygen.
► If you want to read about the scientific process (and see some cool videos), you should definitely share this article with the kids and also read this one.
► If you have a young scientist who wants more science experiments with food, read about how yeast is used in genetics.
Here are some great pairings for this cooking with kids project and doing more food experiments with kids:


Although creating yeast and baking with yeast is fun and interesting, it is a long process. So you can study about other food experiments for kids while you wait!
Can we make yeast at home?
So, can you grow your own yeast as cooking experiments? Yes! There are many different ways to make yeast at home — from a sourdough bread starters using nothing more than flour and water to yeast made from fruits and vegetables!
Natural yeast sources include:
- Potatoes
- Apples (with skins)
- Grapes (with skins)
- Dried Fruit
- Some herbs found in the wild (like mint)
Yeast occurs naturally in the skins of many fruits, so you can try different fresh and dried fruits! (This how to make wild yeast.)
I love these as experiment recipes because kids love seeing what they can use to make yeast and they can document what makes the most yeast bubbles.
Many people choose to make homemade yeast and other items for frugal cooking and saving money!
SCROLL TO THE BOTTOM OF THE POST TO SEE HOW TO MAKE YEAST FROM APPLES AND OTHER THINGS!
How much yeast is in one packet?
If you’ve made bread or other baked items at home, chances are (at some point) you’ve probably used one of those little yeast packets (usually from Fleischmann’s). How much yeast in a packet is usually 1/4 ounce packet, or around 2 1/4 teaspoons.
What can I use in place of active dry yeast?
If you can’t find those yeast packets, you can substitute active dry yeast with 1 teaspoon of baking powder for every cup of flour. However, this substitution only works for baking items like pancakes, cakes, muffins, or pizza dough. Do not use the substitution for kneaded bread recipes.
Does cornmeal contain yeast?
Cornmeal does not contain yeast. It cannot be used to make a yeast-type bread that rises unless you add another grain, like wheat, to the mixture.
OK!
Let’s get to all the different recipes for how do you make yeast!
So… how did they make yeast in the old days?
One of the most well-known yeast starters is the sourdough starter recipes…
HOW TO MAKE YEAST AT HOME FOR EASY SOURDOUGH STARTER RECIPE
How do you make bread with a sourdough starter?
A sourdough starter recipe is easy, just flour and filtered water! But, the process is done in different steps across multiple days with something called sourdough starter feeding and maintenance. So the process may seem difficult, but it’s not. It’s just time-consuming!
IMPORTANT TIP: YOU MUST USE WATER WITHOUT CHLORINE FOR YOUR SOURDOUGH STARTER TO BE SUCCESSFUL.
(The chlorine can cause the starter to die off.)
So, be sure to use filtered tap water or bottled water.
Ingredients
- All-Purpose Flour or 1/2 All Purpose Flour and 1/2 Whole Wheat Flour
- Filtered Tap Water or Bottled Water
- Glass Jars with Lids
Instructions
- DAY 1
- In a glass jar, combine 1/2 cup flour and 1/3 filtered or bottled water.
- Stir until there are no lumps left.
- Cover with a loose fitting lid that allows the starter to "breathe."
- Set the jar in a cool spot and do not disturb for 24 hours. This is your "starter."
- DAY 2
- On Day 2, remove the lid and stir the starter.
- Replace loose fitting lid and continue in a cool spot for 24 hours.
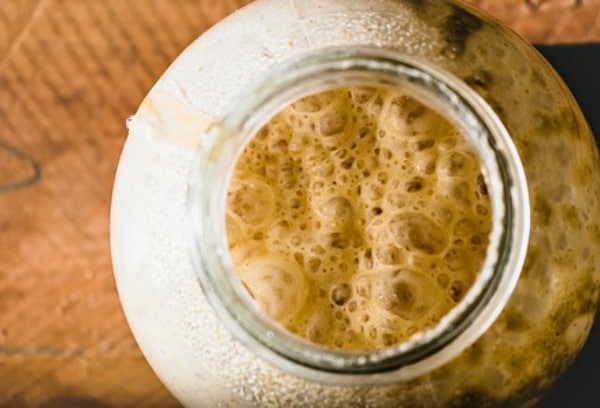
- DAY 3On the morning of Day 3, you should start to see some activity in your starter with bubbles forming on top and you may even notice that your starter has risen some.
- This is the day you will start "feeding" your starter. This process involves taking some of the current starter, discarding the rest, and also includes a "maintenance feeding" at night.
DAY 3 MORNING: FEED THE STARTERIn a CLEAN JAR, add:
- -3 TABLESPOONS starter (discard the rest)
- -1/2 Cup flour
- -1/3 Cup filtered or bottled water
- Stir until well combined and cover with loose-fitting lid. Let sit for 12 hours until you feed it in the evening.
- DAY 3 EVENING: MAINTAIN THE STARTER
MAINTAIN THE STARTER BY ADDING:
- -2 TABLESPOONS flour
- -1 1/2 teaspoons filtered or bottled water
- Stir until well combined. Cover with loose fitting lid. Let sit for 12 hours.
- DAY 4-6Repeat the steps from Day 3, doing the feeding and maintaining each morning and evening.
- Each morning, be sure to use 3 TABLESPOONS of the starter and discarding the rest.
- Then, in the evening, you will maintain it by adding the 2 TABLESPOONS of flour and 1 1/2 teaspoons of water.
- Keep an eye on your yeast! You want to see it get very bubbly. It will also need to double in size to be a strong yeast for bread. (See our tip for keeping track of the size in the NOTES section.)
- **During this time, you may see your yeast rise and then fall again. That means it's not strong enough yet, so you'll need to keep doing the feeding and maintaining cycle. Your yeast may be ready sooner than 7 days or maybe a little longer.
DAY 7In the morning of Day 7:
In a CLEAN JAR, add:
- -3 TABLESPOONS starter (discard the rest)
- -1/2 Cup flour
- -1/3 Cup filtered or bottled water
- Stir until well combined and cover with loose-fitting lid. Let sit for 4 hours.
- Day 7: 4 Hours Later
- It's time to test your starter to see if it's ready to bake with! (YAY!)
- Do this by taking a spoonful of starter into a glass of room temperature water. If the starter floats, it's ready to use to bake with!
- If the starter doesn't float, it is not ready. Continue with the evening maintenance schedule and repeat DAY 7 instructions on DAY 8 until the starter is ready.
IF YOU WANT TO HAVE FRESH STARTER TO USE ANYTIME, BE SURE TO SAVE SOME OF THE STARTER BEFORE YOU BAKE WITH IT. YOU CAN KEEP IT IN THE REFRIGERATOR AND WILL NEED TO MAINTAIN IT BY DOING A SOURDOUGH STARTER FEEDING ONCE PER WEEK.
Notes
Sourdough Starter Potato Flakes
There is also a sourdough starter that is made with potato flakes. You may have heard this called a variation on Amish Friendship Bread starter.
This starter actually uses yeast packets.
The starter is:
- 1 cup warm water
- 1/2 cup sugar
- 1 package (2 1/4 teaspoons) dry yeast
- 3 level tablespoons instant potato flakes
Now that you’ve made your sourdough starter, it’s time to try it out and make a sourdough bread recipe!
Sourdough Starter Bread Recipe
Sourdough Starter Bread Recipe
Ingredients
- FOR THE LEAVEN:
- 1 Tablespoon active sourdough starter see our recipe
- 1/2 cup all-purpose flour or bread flour
- 1/3 cup water
- FOR THE DOUGH:
- 2 1/2 cups water divided
- 1 Tablespoon salt
- 5 1/2 cups all-purpose flour or bread flour
Instructions
MAKE THE LEAVEN:
- In a large bowl, combine 1 Tablespoon active sourdough starter (see our recipe), 1/2 cup all-purpose flour (or bread flour), and 1/3 cup water.
- Mix completely to form a thick batter.
- Cover bowl with plastic wrap or lid and let sit at room temperature for 12 hours (or overnight).
- After 12 hours (or overnight), the leaven will be ready to use if it is bubbly on top. Test the leaven by dropping a spoonful in a glass of warm water. If it floats, it's ready to use.
NEXT:
- In a small bowl, mix: 1/4 cup water and 1 Tablespoon of salt. Stir. Set aside, stirring occasionally to dissolve the salt.
- To the leaven, add 2 cups of water. Use your hands to break up the leaven in the water to help it dissolve. (Some clumps will remain.)
- Add in 5 1/2 cups all-purpose flour (or bread flour). Stir with a rubber spatula, making sure that no dry flour is left and a dough is formed.
- Cover the bowl with plastic wrap (or a clean dish towel) and let the dough rest for at least 30 minutes (but no longer than 4 hours). **This is called the autolyse stage.
- After the rest period (autolyse stage), pour the dissolved salt water over the dough in the bowl. Pinch and squeeze the dough to distribute the salt water. (Dough will be loose and wet.)
- FOLDING THE DOUGH (TOTAL: 2 1/2 HOUR PROCESS)
- Starting on one side of the dough, grab the edge, lift up the edge, and then fold over the dough onto itself. Turn the bowl and repeat with the next edge, doing this a total of 4 times. **You are folding the dough and not kneading!
- Let dough set (rest) for 30 minutes.
- Repeat the process of folding the dough over again and then letting it rest for 30 minutes.
- Repeat this process a total of 6 times, which is every 30 minutes for 2 1/2 hours. The dough will become tighter and smoother throughout the process.
- After the final folding, cover the bowl with plastic wrap or a clean dish towel and let it rest, undisturbed, for 30-60 minutes when it has puffed up slightly and looks a little larger than when you started. **It will NOT double in size.
- DIVIDE & SHAPE THE DOUGH
- Prepare a work surface by sprinkling a light layer of flour on it.
- Gently, take the dough out of the bowl and place it on the floured work surface, being careful not to deflate the dough.
- Use a pastry scraper (or large knife) and divide the dough in half.
- Flour your hands or a pastry scraper and gently form each dough half into a round.
- Rest the dough for 20-30 minutes.
- While the dough is resting, line two mixing bowls (or even colandars) with clean dish towels. Dust the towels heavily with flour, using your fingers to rub the flour into the bottoms and sides. Use enough flour to form a thin layer on each dish towel. (It may seem like too much, but it's not!) These are your "proofing baskets."
- Working with one dough ball at a time: Dust the first dough ball with flour. Using a pastry scraper, flip over the dough so now the floured side is down and the sticky side is up.
- Shape the dough like you did earlier by folding. Starting with one side, grab the bottom of the dough and gently pull it up and over to the center. Repeat with each side until. Use your hands around the bottom edges to shape the dough into a round so it's tight. Repeat with second ball of dough.
- Generously dust the tops and sides of the shaped dough with flour. Place them in the proofing baskets with the seams from shaping on the bottom (upside down).
- Cover the proofing baskets loosely with plastic wrap. Let them rise for 3-4 hours at room temperature, until they poof up. (You can also allow them to rise overnight by placing them in the refrigerator for 12-15 hours).
- BAKE THE BREAD!
- Heat oven to 500°F.
- Place two Dutch ovens or heavy pots with lids into the oven to heat.
- Carefully remove one of the Dutch ovens/pots from the oven and remove the lid. Carefully place one dough round into the pot (seam side down). Repeat with second loaf in second pot. (If you only have one Dutch oven or heavy pot, just bake one bread round and then the second round after.)
- Using a serrated knife, score the bread.
- Cover with lid and place back in oven. Bake for 20 minutes.
- After 20 minutes, reduce the oven temperature to 450°F and bake the bread for 10 more minutes. **DO NOT LIFT THE LID TO CHECK THE BREAD. ALLOW IT TO CONTINUE BAKING.
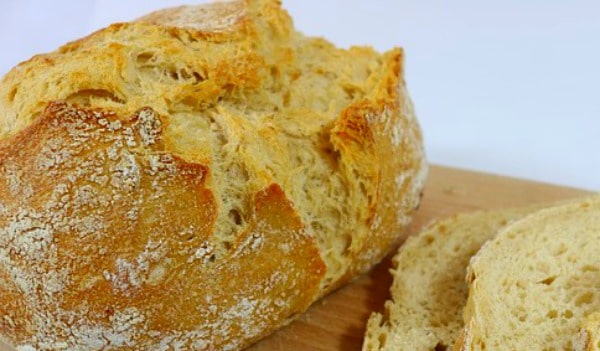
- After the 10 minutes, remove the lid(s) and continue baking another 15-25 minutes. After this, the loaves will be springy and dry and start to have a golden color. Continue baking until the loaves are a deep, dark golden brown (probably darker than you feel comfortable with).
- Remove pots from oven and carefully (using tongs or a spatula) lift the loaves out of the pots and place them on wire cooling racks.
- Cool to room temperature before slicing with a bread knife.
- Store sourdough bread at room temperature in a paper bag for 3 days or wrap tightly in plastic wrap and freeze for up to 2 months.
Nutrition
Nutrition Note
Nutrition calculations are approximate. If you're following a special diet, please calculate your own nutrition values.
Other Uses for Sourdough Starter (Besides Sourdough Bread)
- Pancakes
- Waffles
- Cake
- Muffins
- Bagels
- Pie crusts
- Sourdough crackers
- Pretzels
- Batter for fish or vegetables
- Sweets
- & MORE!
Now that we’ve talked about how to make yeast from flour (and bread!), let’s look at some other ways on how to make yeast water for bread and other baking goodies. So, don’t end your cooking experiment just yet!
What is yeast water?
Yeast water is another form of wild yeast. However, it is not the same as the wild sourdough yeast starter (which is for making sourdough starter for sourdough bread). Yeast water is added directly to your recipe and doesn’t require a starter process.
(Yeast waters make great food projects for science fair projects or any time you want food science experiments!)
EXPERIMENT ON FOOD: OTHER IDEAS ON HOW TO MAKE YEAST
How To Make Yeast From Apples
You’ll need:
- Clean glass jar (with lid or cheesecloth)
- Cut up apple (with skin)
- Filtered tap or bottled water
Directions:
- Fill up a glass jar a 1/4 to 1/2 full of cut up apples (skin on).
- Pour water over the apples until the jar is 3/4 way full. (Do not fill up to top!)
- Place the lid loosely on the jar (or use cheesecloth) and place jar in a warm area. (A windowsill that gets sun is perfect!)
- Around day 3, you will start to see bubbles forming in your water. This is an indication that the yeast is reacting to the carbohydrates in your apple.
- If you are using a lid, shake the jar each day and then open the lid to allow some air to get in.
- After you see a lot of bubbles forming and a foam around the top, your yeast has formed!
- Use the yeast water where recipes call for yeast!
What causes yeast to foam?
The Saccharomyces cerevisiae (S. cerevisiae) is a yeast fungus that feeds on sugar from the item (like fruit or flour) and produces energy, releasing alcohol ethanol and carbon dioxide. The alcohol ethanol evaporates and the carbon dioxide makes “ballon-like bubbles” in liquid or dough. Because there is no place for it to go, it rises to the top. Many of these carbon dioxide bubbles form together to sometimes create a foamy appearance in liquid, but the bubbles are also what helps bread rise.
How to Make Yeast from Potatoes
You’ll need:
- Clean glass jar (with lid or cheesecloth)
- Medium peeled potato
- 1 teaspoon salt
- 1 teaspoon sugar
- Filtered tap or bottled water
Directions:
- Peel one medium potato.
- Add 4 cups of water to a pot.
- Add peeled potato and boil under potato is soft.,
- Remove potato (reserve the water!)
- In a small bowl, mash the potato.
- On top of the potato mash, sprinkle 1 teaspoon of salt and 1 teaspoon of sugar.
- Place potato mash mixture into a glass jar.
- Fill jar with potato water for until it’s 3/4 full.
- Place lid loosely on jar or cover with cheesecloth.
- Place jar in a warm place, like the sun of a window sill.
- If you are using a lid, shake the jar each day and then open the lid to allow some air to get in.
- In around 3 days, you should see yeast forming with bubbles on the surface.
- Use the yeast water in any recipe that calls for yeast.
How to Make Yeast From Raisins
You’ll Need:
- Clean glass jar with lid
- 1/3 cup Raisins
- 1 teaspoon sugar or honey
- Filtered tap or bottled water
Directions:
- Place the raisins in the glass jar.
- Add 1 teaspoon sugar or honey.
- Fill the jar 3/4 way full with filtered tap or bottled water.
- Place lid tightly on jar and then shake to mix.
- Loosen lid until it is just lightly on the jar.
- Place jar in a warm place, like the sun of a window sill.
- If you are using a lid, shake the jar each day and then open the lid to allow some air to get in.
- In around 3 days, you should see yeast forming with bubbles on the surface.
- Use the yeast water in any recipe that calls for yeast.
NOW THAT YOU KNOW HOW TO MAKE YEAST AT HOME, WHAT WILL YOU BAKE WITH IT?
LOOKING FOR FUN COOKING PRINTABLES FOR KIDS?
How do u use the potato yeast water for a recipe? Like how much??
Hi Liz. It really depends on your recipe. For example for bread, if it says to use dried yeast + 1 cup of water, I’m just replacing that one cup of water and yeast with 1 cup of the yeast water and mixing that with the starter.
Kathryn Allen
How long will yeast water last once it is made? Can you freeze it for later use?
What is the best way to store the yeast water? What’s the longevity, or the process? Strain the liquid into a jar and keep in the fridge? Do you need to feed it like a sourdough starter?
Thanks-
Hi Julia, Thanks for the questions! I’m getting so many questions that I’m in the process of updating the post (including adding your questions/answers). Stay tuned! (We’re store the water in the refrigerator with everything still in it and shake it every few days.)
Does it have to be done in a glass jar?
I believe glass is better because it doesn’t interact with the chemical reaction taking place.